Processing of Linear Array Data
Introduction
Processing of linear array data is as far as possible integrated in InterSAFT that it can be used like ordinary (monostatic) impulse-echo data. Because of the specific structure of the data, a separate reconstruction function is implemented, which cannot be used for the Process-Control features of the software.
The Data
When the data of the linear array are given as a set of lbv - files, with a specific numbering. (Ex. 1-1.lbv, 1-2.lbv …) The basic information (Size, Sampling Rate, Data type …) has to be identical for all files. To get a data file into InterSAFT, a ghk-header file is necessary, which describes the basic information of the lbv file. (To remember: ghk-files can contain the binary data or can contain the file information for the reference to an external binary file.) The software module ‘Edit header’ can be used to generate or to adapt ghk-files for this purpose.
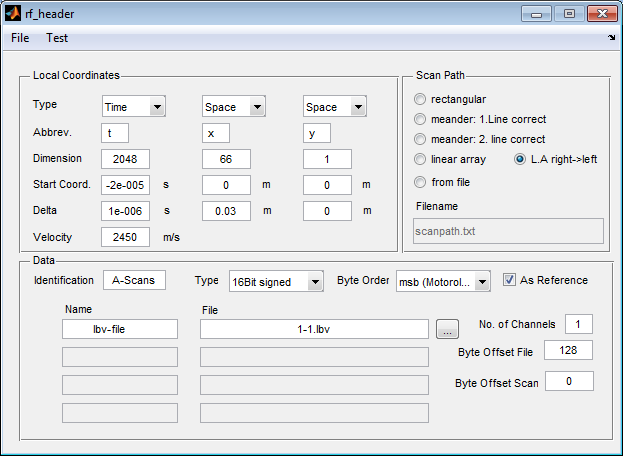
Panel to define the import parameters for lbv files.
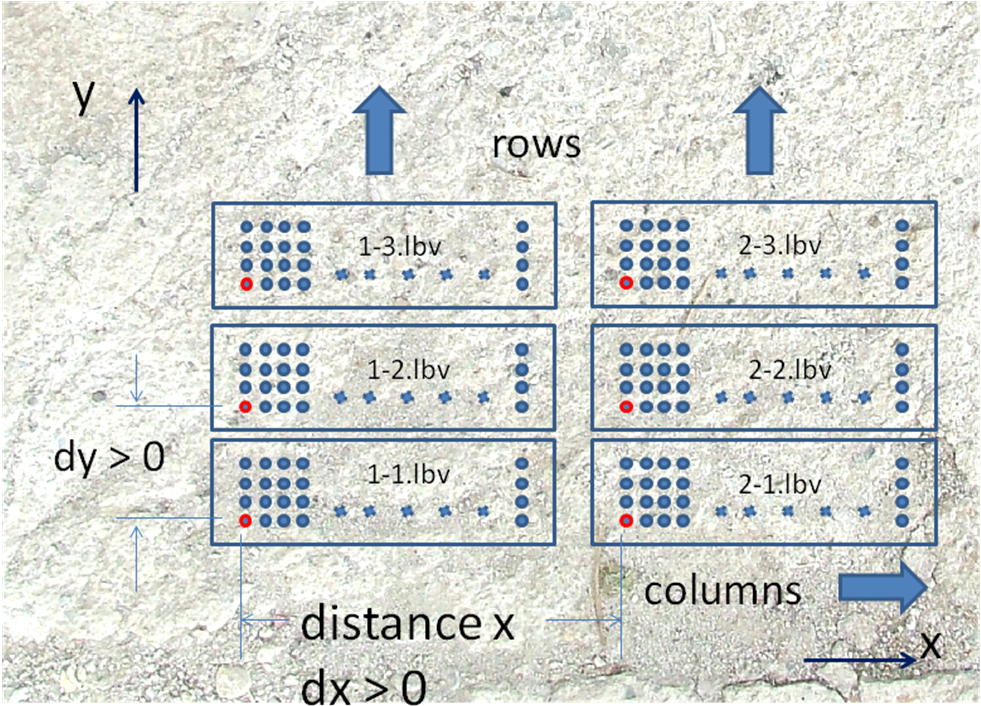
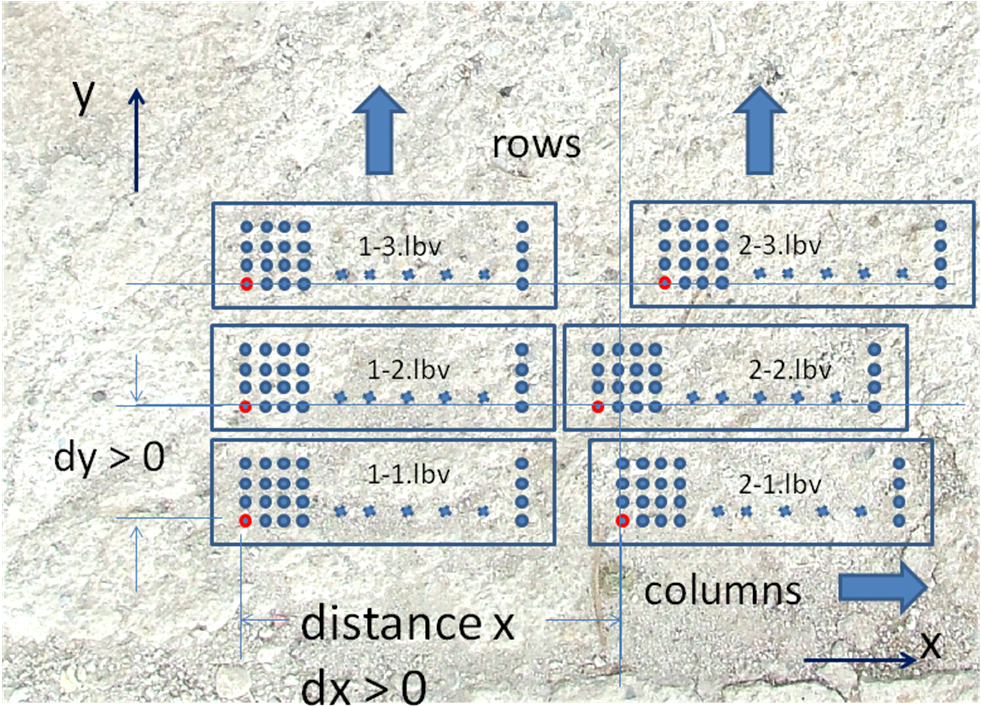
Linear Array data are integrated into the existing scheme by selection a scan path type: ‘linear array’ or ‘L.A. right->left’. The dimensions of the used linear array is derived from the number of elements in x-direction: For example, 66 means: 66 A-scans are in one array line which leads to an linear array with 12 elements. The position of the first transmitting device (left or right) is selected be the scan path type (s. above). The distance between the array elements is specified as delta (x). The position of the left-front corner of the array is defined by the start coordinates (x) and (y) in meter.
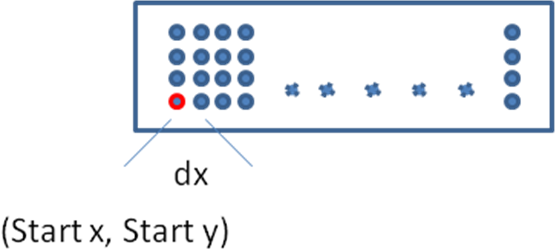
Linear array orientation and coordinates
As mentioned, usually, for any lbv file there has to exist a ghk header. But in our case there may be a lot of lbv files (for any position). Therefore a panel is programmed (is_series_processing), which is used to combine the information of all lbv files into one ‘series file description’ - file. InterSAFT can use one single lbv file or the series description file for all lbv files of a measurement set.
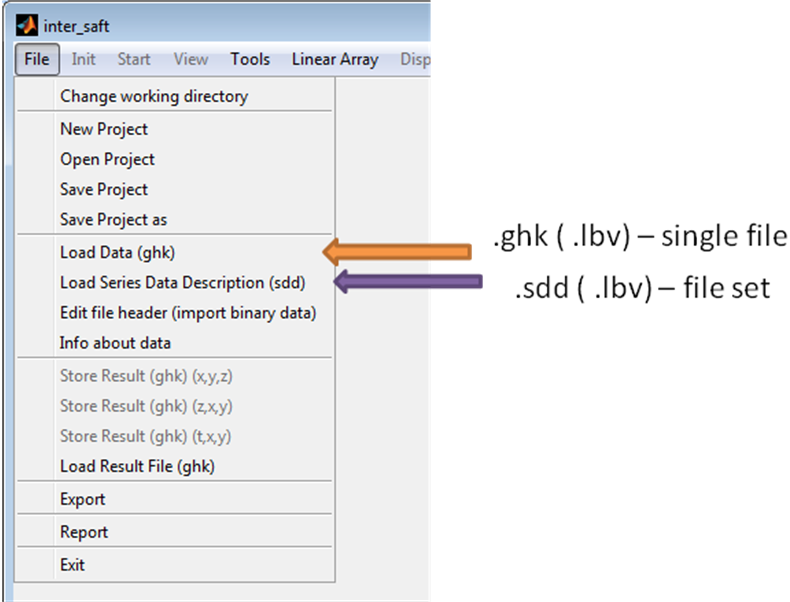
Selection of single files or series description.
To collect the data into a series description open ‘Linear Array’->’Series Definition’.
There exists two modes of this panel:
- stand alone:
You can collect files and give their position. Or
- connected to InterSAFT:
The file list of InterSAFT is displayed and you can switch on or off single files. This mode is called, if you start ‘Series Definition’ from InterSAFT with an already loaded series definition file. You can leave this mode by ‘File -> stop inter_saft connection’. The interactive connection to inter_saft is then broken. (Changes in the panel have to be saved and must be reloaded in InterSAFT. (Subject to be changed in a future revision))
Mode (1)
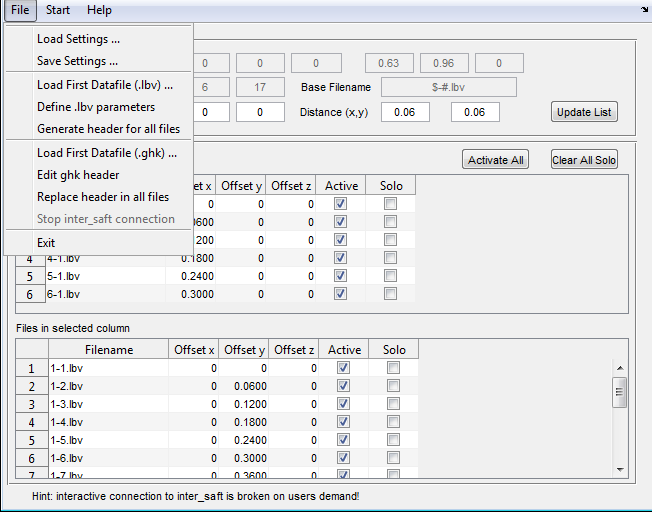
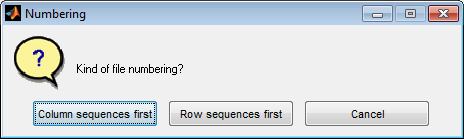
Select ‘File -> Load First Datafile (.lbv), select the first file (1-1.lbv) and the tables of files for rows and columns are filled automatically. (You have to answer the question for file numbering: Column sequences first - means that the first number in 1-1.lbv counts the columns (x-direction)). After that, the first measurement point (Base offset (x,y) ) and the Distances (x,y) have to be defined. With ‘Update List’, the calculated offsets are assigned to the files. It is important to know, that the y-coordinate of all files in a row have to be identical. This is not necessary for the x-coordinate. The position in a row can vary flexibly.
After specifying the individual offsets, the information has to be saved as ‘save setting’ in a file with the extension .sdd (default: sp_setup.sdd). After closing the function window, the .sdd file can be loaded into InterSAFT as described above. If a .sdd file is loaded, the extension of the measurement has to be adjusted. This is done by ‘init -> initialize parameters’ from the InterSAFT main menu. For linear array data, an extra extension on all sides of the scan area is used to define the reconstruction area. The default setting is 10 times the distance of indiviual elements in the array in each direction. This is because the linear array observation area is larger than the area just under the measurement surface. The extension can then be adjust individually.
Select or Unselect Files
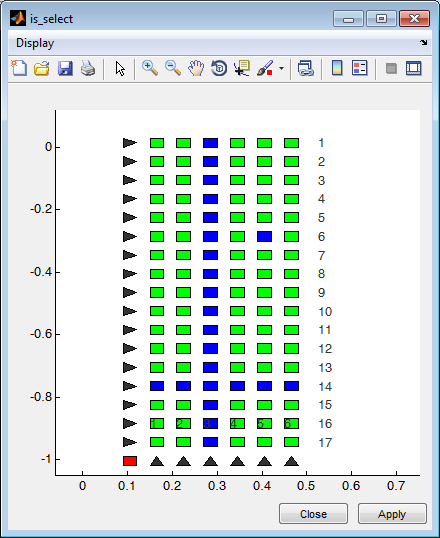
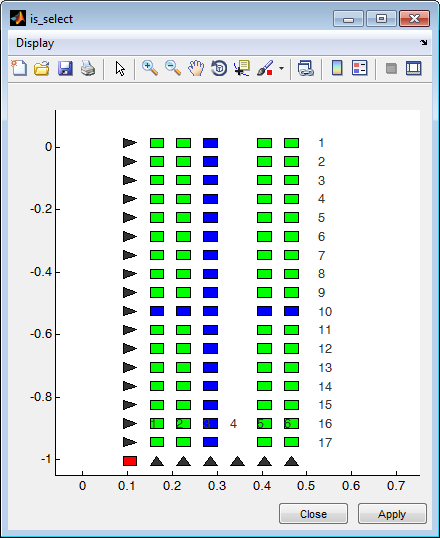
Within ‘Series Definition’ or with ‘Linear Array -> Select Array Position’ individual files, rows or columns can be selected to take part on the reconstruction process. Clicking on an array position switches the individual data file to a solo mode (blue). Which means, that if one or more elements are blue, only those elements are used for reconstruction. A row and column can be selected by clicking on the corresponding triangle. The red rectangle at the left bottom line switches all ‘solo’ positions to ‘off’, and the complete measurement set is used again. Elements are shown green, if they are activated in ‘Series Definition’. If an element, a column or a row is not activated it cannot be used for calculation in general and cannot be switched to solo.
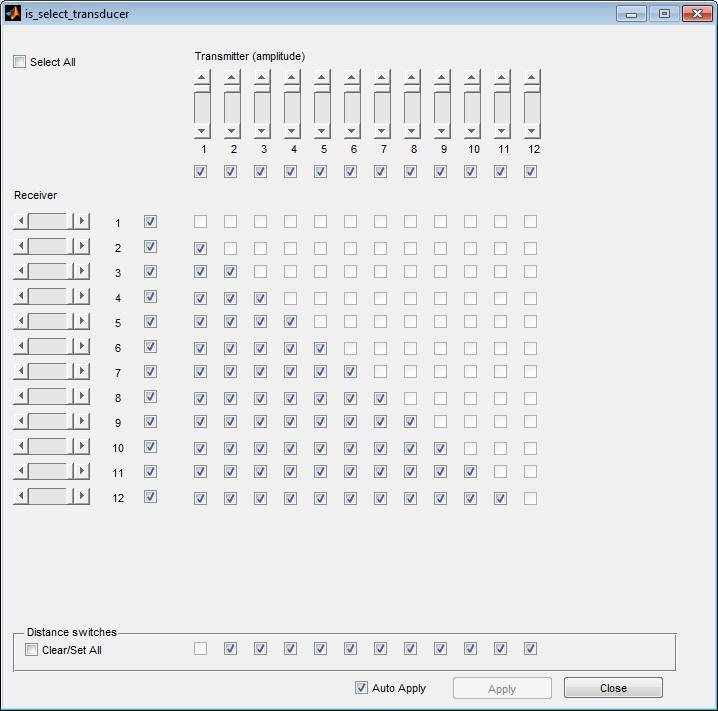
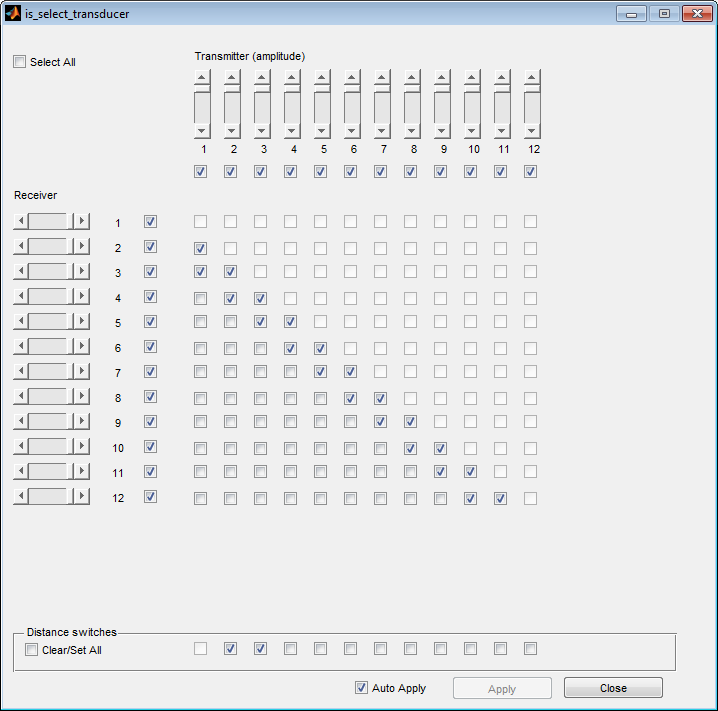
Selecting an individual transducer within the linear array
From InterSAFT main menu select ‘Linear Array - Select transducers in Array’. With this panel the selection of transmitter and receiver connection is possible. Any connection is selected as ‘switched on’, if the blue checkmark is set at the intersection of the transmitter column with the receiver row. For a transducer array with 12 elements 66 connections are available. Because it is not possible to use an element as transmitter and receiver at the same shot, the diagonal of the matrix is empty. Additionally, changes of the sensitivity of any element acting as receiver or transmitter is possible. At the lower part of the panel we can switch elements of constant distance to each other on or off. In the example only transducer / receiver pairs with a distance of 1 or 2 elements are switched on. The panel is programmed for a maximum number of 16 elements in the array. The unused switches for smaller arrays are hidden.